Categories Pest Identification & Prevention

Pantry Pests in Milwaukee: What’s in the Flour Before Holiday Baking

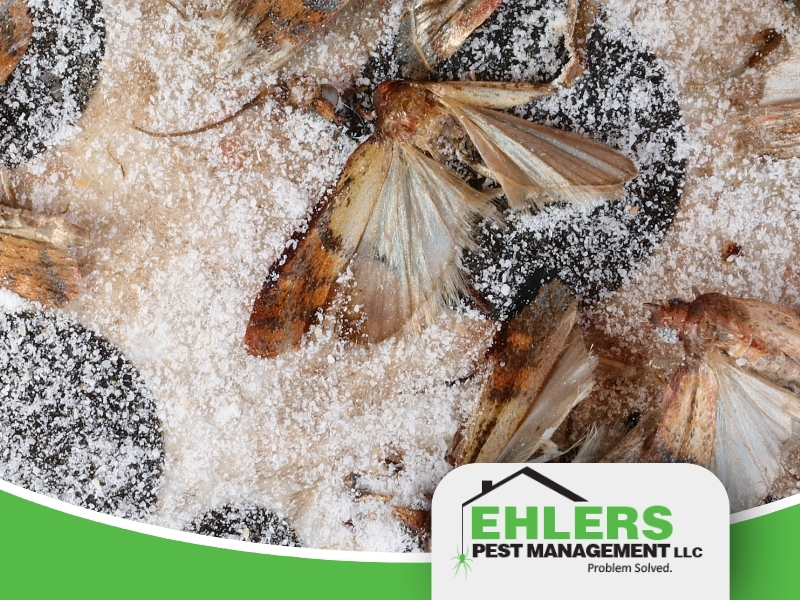
Close-up of dead moths and dark specks on a powdery surface, possibly food infested by pantry pests—an issue that can often arise in Milwaukee homes, especially during the holiday baking season. The Ehlers Pest Management LLC logo appears in the bottom right corner.

Pantry pests announce themselves at the worst possible time, which in Wisconsin is late October, right when people pull out the flour and the bag of pecans they bought back in July. You open a container, something moves, and the immediate assumption is that the kitchen wasn’t clean enough.

That assumption is almost always wrong, and it sends people off cleaning instead of doing the one thing that actually ends it.

Pantry pests come home from the store inside a package that already carried eggs, so finding them says nothing about how clean a kitchen is. The package you found them in is usually not the source. Check birdseed, pet food, old spices, and forgotten baking supplies first.

What are pantry pests?

A handful of insects that feed on stored dry goods, and in this area it’s usually one of four.

Indian meal moths are the most common by a wide margin. The adult is a small moth, roughly half an inch, with wings that are pale toward the head and coppery toward the tips. What you notice first is usually the adults flying a slow, wandering path across a room rather than the larvae. The larvae leave silk webbing, and finding that stringy matting in the corner of a bag of flour or across the surface of dried fruit is the confirmation.

Sawtoothed grain beetles are tiny, flat, brown, and fast, and they get into sealed-looking packaging through folds and seams. Flour beetles look similar and turn up in the same places.

Weevils are the ones with the long snout, and they go for whole grains, rice, and birdseed rather than processed flour.

Drugstore and cigarette beetles are small, round, and brown, and they’re the ones in spices, dried herbs, pet food, and anything that’s been in the back of a cabinet for a few years.

Where did they come from?

The store, or a warehouse before that.

These insects get into products during processing, storage, or transit, and the eggs are microscopic. A sealed bag of flour can come home already carrying them, sit in a cabinet for two months while nothing appears to happen, and then produce adults once the eggs hatch and the larvae mature.

That’s why this isn’t a housekeeping problem, and it’s worth saying because the shame keeps people from calling. A spotless kitchen and a cluttered one get pantry pests at the same rate. What differs is how long it takes to notice.

Why are there moths on my ceiling?

Because the larvae crawl away from the food before they pupate, and they can travel a surprising distance.

Indian meal moth larvae leave the package they developed in and look for a protected spot to spin a cocoon. That often means the ceiling, the top edge of a wall, the crown of a door frame, or the underside of a shelf, sometimes a room or two away from the kitchen.

So moths on the ceiling of a dining room don’t mean the problem is in the dining room. They mean something in a nearby cabinet has been producing them for a while. Following the moths back to their origin is the whole job.

How do you find the real source?

Systematically, and further afield than people expect.

The package you found them in is frequently a secondary infestation rather than the original. Adults lay eggs in whatever else is available, so by the time you notice, several containers may be involved and one of them started it.

Check in this order:

  • Birdseed and pet food, including anything stored in the garage or a mudroom. These are the most common single source and almost nobody checks them first.
  • The back of the spice cabinet, particularly jars that predate your current kitchen.
  • Baking supplies bought for a previous holiday: flour, cornmeal, nuts, dried fruit, chocolate, and anything with grain in it.
  • Decorative items with seeds, grains, dried corn, or dried flowers, which is a real October category.

Take everything out of the cabinet rather than looking at what’s in front. Check the underside of shelves and the corners where the shelf meets the wall, since that’s where webbing and cocoons collect.

What should you throw out, and what can you keep?

Anything with visible webbing, larvae, adults, or a clumped, off-smelling texture goes out, and it goes out to an outdoor bin rather than the kitchen trash.

Unopened items in glass or heavy plastic with intact seals are usually fine. Items in paper, cardboard, or thin film in the same cabinet are suspect, because these insects chew through all three.

If you want to save something you’re unsure about, freezing it for several days kills eggs and larvae at every stage. That’s also worth doing with any bulk grain, flour, or birdseed you buy going forward.

Does spraying help?

Not much, and a food cabinet is the wrong place for it.

The larvae are inside packaging where nothing sprayed on a shelf reaches them, and the adults you can see are the end of the cycle rather than the cause. Applying insecticide inside a cabinet where food is stored trades a manageable problem for a worse one.

What works is removal of the source, then a thorough vacuum of the shelves, the shelf edges, the corners, and the cracks where shelving meets the wall, followed by wiping down with soap and water. The vacuum matters more than the wiping, because it picks up eggs and cocoons out of the seams.

How do you keep it from happening again?

Three habits, and the first one does most of the work.

  • Move dry goods out of original packaging and into airtight glass or hard plastic with a gasket. Paper and thin film are not barriers to any of these insects.
  • Freeze new bulk purchases of flour, grain, birdseed, and pet food for several days before shelving them.
  • Rotate and date what’s in the cabinet, and be honest about spices and baking supplies that have been back there for years.

What to do next

Before you start baking, take twenty minutes and empty one cabinet at a time, checking the underside of every shelf. If you find webbing, follow it outward rather than assuming the first bag you found is the source. And check the birdseed.

If it keeps coming back after you’ve cleared out the obvious source, or if it’s spread past one cabinet into multiple rooms, that’s the point where a professional inspection saves you a season of throwing out groceries. Ehlers Pest Management serves southeastern Wisconsin, and you can reach our experienced team at (414) 303-6926 to schedule service. A certified technician can identify the species, which narrows down what it’s been feeding on, and find the source you’ve been walking past.

Categories Pest Identification & Prevention

What Happens to a Wasp Nest in Winter, and Should You Remove It?

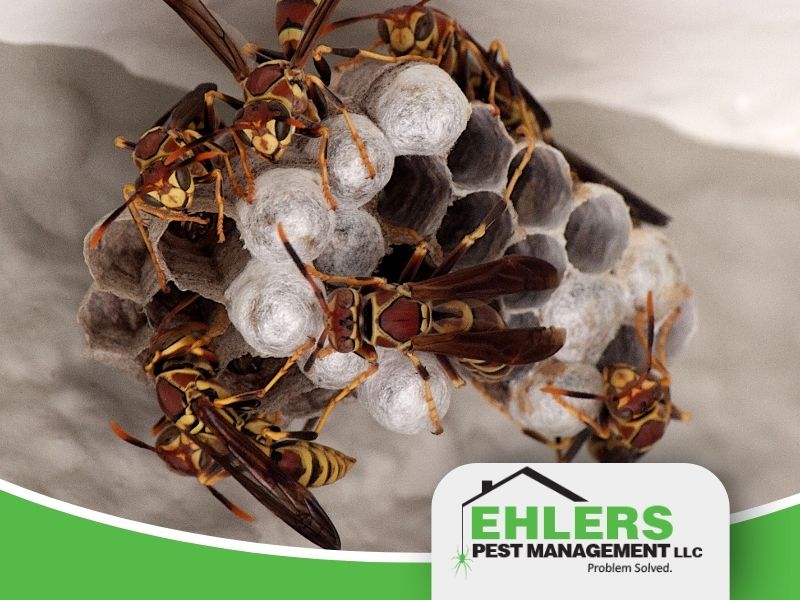
Close-up of several wasps on a nest, attached to a white surface. This detailed image could reveal how a wasp nest in winter remains intact despite colder conditions. A green and white Ehlers Pest Management LLC logo is overlaid in the bottom right corner.

Every fall, once the leaves come down, people find the wasp nest that was hidden in the tree or under the eave all summer and want to know what to do with it. The useful answer is that a wasp nest in winter is already empty, it will never be used again, and whether to take it down is mostly a question of how it looks.

Here’s what actually happened inside it, why the wasps won’t be back, and what is genuinely worth doing before spring.

A wasp nest in winter is empty. Yellow jacket and hornet colonies die off completely in Wisconsin, and only newly mated queens survive by sheltering elsewhere. No wasp species here reuses an old nest, so last year’s nest will never be occupied again.

Is the nest still alive?

By late fall in Wisconsin, no.

A yellow jacket or bald-faced hornet colony runs for a single season. It starts with one queen in spring, builds all summer, peaks in late August and September, and then produces the next generation of queens and males. Once that’s done the colony has finished its purpose. The workers die, the old queen dies, and the nest is finished by the time you’ve had a few hard freezes.

The only survivors are the newly mated queens, and they don’t stay in the nest. They leave and find somewhere protected to overwinter on their own, which is usually under loose bark, in leaf litter, or inside a structure.

Do wasps come back to the same nest?

No. None of the species in Wisconsin reuse an old nest.

Each spring a surviving queen starts over from scratch, building a small nest alone and raising the first workers herself. She doesn’t return to where she was born and she doesn’t repair an existing nest. The papery structure hanging in your tree is a finished object, not a dormant one.

Left alone outdoors, an old nest breaks down over the winter and spring. Rain, wind, and freeze-thaw cycles take it apart, and birds pull it apart further for nesting material.

Why do wasps keep nesting in the same spot then?

Because the location is good, not because the nest is there.

This is the part that confuses people, and it’s a real pattern rather than a coincidence. If the same soffit corner, porch ceiling, or shed eave gets a paper wasp nest every single year, that spot has the combination wasps look for: sheltered from rain, warm in the afternoon, protected from wind, and near a food supply.

A queen scouting in April evaluates the same conditions the last one did and reaches the same conclusion. Removing the old nest changes nothing about that. Changing the conditions or blocking access does.

Should you remove a wasp nest in winter?

Sometimes, and the reasons have nothing to do with preventing next year’s wasps.

Worth removing: a nest that looks bad somewhere visible, a nest pressed against siding or trim where it traps moisture, and any large nest inside a structure. That last one matters most, because the dead brood and comb left in a wall void or attic becomes a food source for carpet beetles and larder beetles, and those go on to damage wool and stored fabric.

Fine to leave: an exterior nest high in a tree or on a garage gable where nobody sees it or walks under it. It’ll come apart on its own, and taking it down means getting a ladder out in cold weather for an aesthetic result.

How do you know it’s actually finished?

Watch it before you touch it, and pick your day carefully.

Wait until you’ve had several hard freezes, not just one cold night. A stretch of warm weather in late October can bring stragglers back out, and a nest that seems dead on a forty-degree morning can have activity at two in the afternoon.

Then stand well back on a sunny afternoon, which is when any survivors would be moving, and watch the entrance for several minutes. No traffic in or out over that window generally means it’s done.

Two cautions regardless. Don’t take on a nest that requires an extension ladder, which is our own rule for yellow jacket nests above eight feet, and don’t handle any of this if someone in the household has a sting allergy.

What about the queens that survived?

They’re the part of this worth paying attention to, because they’re the ones that come back.

A large yellow jacket colony can produce a substantial number of new queens before it breaks up, and every one of them needs somewhere to spend the winter. Some find bark, leaf litter, or a rotting log. The rest look for a building, and they settle into attics, wall voids, gaps behind siding, and the folds of insulation.

That’s why people find wasps at an upstairs window during a January thaw. Those insects aren’t from the nest you can see. They’re queens that moved into the structure in September and got woken up by a warm spell.

It also means the number of nests around your property next summer depends partly on how many queens got into your building this fall, which is a thing you can affect.

What about a nest inside a wall?

Different situation, and the timing runs the other way.

A colony inside a wall void or attic is dead by winter like any other, but the material stays there. Comb, dead brood, and dead insects sit in the cavity and attract the scavenger beetles described above, and in a large nest there can be a lot of it.

The practical approach is to seal the exterior entry point over the winter, once activity has stopped, and deal with the cavity itself only if there’s a reason to open it up. Sealing while a colony is active is the mistake, because it traps them and their only remaining exit is into your living space.

What’s actually worth doing this winter?

Closing the openings, which is the thing that affects next year.

Winter is the right window because activity has stopped and the queens haven’t started new nests yet. The list is short: soffit and fascia gaps, siding seams and corners, the openings around vents and utility penetrations, gaps at window and door frames, and attic or gable vents with torn screening.

That’s the same list that keeps mice and box elder bugs out, so one pass covers several problems. And a queen that can’t get into a wall void in April never becomes a thousand-insect colony in September, which is a much easier problem to have prevented than to solve.

What to do next

If the nest is outdoors and out of the way, you can leave it and it will take care of itself. If it’s somewhere visible, wait for a solid cold stretch, confirm there’s no traffic on a warm afternoon, and take it down from the ground or leave it to someone with the right equipment.

The more valuable job is finding where they got in. Ehlers Pest Management works throughout southeastern Wisconsin, and you can reach our experienced team at (414) 303-6926 to schedule service. A certified technician can identify the entry points on your building, tell you which ones matter, and handle the sealing over the winter so the same spot isn’t producing a nest again next August.

Categories Rodents

Mouse Damage in Milwaukee Homes: Insulation, Wiring, and Attics

A close-up of a brown mouse standing on a surface, highlighting potential mouse damage, with the Ehlers Pest Management LLC logo in the bottom corner.

Mouse damage is easy to underestimate because the part you see is a few droppings behind the toaster. The part you don’t see is in the attic, inside the wall cavities, and along the wiring runs, and it accumulates quietly for months before anything obvious happens.

Here’s what mice actually do to a house in southeastern Wisconsin, roughly in order of how much it costs to fix.

Mouse damage shows up in three places: insulation they nest in and contaminate, wiring they gnaw to keep their teeth worn down, and stored items in attics and basements. The wiring is the one that matters most, because chewed insulation on a live wire is a documented fire risk.

What does mouse damage actually look like?

Four things, and only one of them is the thing people picture.

  • Insulation, which they nest in, tunnel through, and contaminate.
  • Wiring, which they gnaw constantly, including the low-voltage runs for thermostats, doorbells, and networking.
  • Stored belongings, particularly anything in cardboard boxes in an attic or basement.
  • Ductwork and the surfaces around it, which spreads the contamination through the house.

Droppings on a counter are a symptom of all of that. They’re the least expensive part of the problem.

What happens to attic insulation?

It stops working, and it doesn’t recover.

Mice tunnel through blown-in cellulose and fiberglass to build nests, which compresses the material and destroys the air pockets that make it insulate in the first place. Compressed insulation loses a meaningful share of its R-value, and in a Wisconsin winter you pay for that every month.

Then there’s the contamination. Mice urinate as they travel rather than in one spot, so an active population soils a wide area over a season. Soiled insulation holds odor, and in an attic that odor moves into the house whenever air pressure shifts. Once it’s bad enough, the fix is removal and replacement of the affected area rather than cleaning, which is the single most expensive thing on this list.

Is chewed wiring really a fire risk?

Yes, and it’s the reason we push people to deal with rodents rather than tolerate them.

Mouse incisors grow continuously, so they gnaw whether they’re hungry or not, and wire insulation is exactly the right hardness for the job. What that leaves is exposed conductor inside a wall cavity or an attic, often surrounded by nesting material. That combination is how rodent activity turns into an arc fault, and it’s a recognized cause of structure fires.

The low-voltage damage is more common and shows up sooner. Thermostat wire, doorbell wire, alarm and camera runs, and network cable are all thin and easy to chew. If your furnace started behaving strangely or a hardwired smoke detector began chirping for no reason, rodents are worth ruling out before you call an electrician.

You generally can’t inspect this yourself, because the damage is where the mice travel and that’s inside the structure. What you can do is take the activity seriously early, before there’s been time for much of it.

What about cars parked in the garage?

Worth knowing about, because it surprises people every fall.

Modern vehicles use soy-based and other plant-derived compounds in wire insulation, and rodents will chew it. A car that sits in an attached garage through a Wisconsin winter is a warm, sheltered place with a stationary engine bay, and mice nest in it. The repairs run into real money and they’re frequently not covered the way people assume.

If your garage has mouse activity, that isn’t only a garage problem. It’s the staging area for the house and a risk to whatever is parked in it.

What should you know before cleaning up droppings?

One thing, and it matters more than the cleaning method.

Don’t sweep or dry-vacuum droppings and nesting material. That puts particles into the air you’re breathing. The standard practice is to ventilate the space first, spray the area with a disinfectant solution and let it sit, then wipe it up with paper towels while wearing gloves and bag it.

The realistic health concern in a Wisconsin home is allergens and asthma triggers rather than anything exotic, along with bacteria on surfaces where food is handled. That’s reason enough to handle it properly without treating it as a crisis.

Does homeowners insurance cover it?

Usually not, and this catches people at the worst possible moment.

Rodent damage is commonly excluded from homeowners policies, on the reasoning that it develops gradually and is preventable with maintenance. Insulation replacement, chewed wiring, and damaged stored goods frequently fall outside coverage. Fire that results from rodent-chewed wiring is a more complicated question and depends on the policy.

Worth ten minutes with your actual policy rather than an assumption, because the answer changes how much the prevention is worth to you.

How long does it take for the damage to add up?

Faster than the timeline most people have in their head.

A pair of mice that gets in during October has produced multiple generations by February, because a female can have several litters a year and the young breed at around six weeks. That population is nesting, chewing, and contaminating the entire time, in spaces nobody looks at until spring.

There’s a secondary problem too. Mice that die inside a wall or attic become a food source for blow flies, carpet beetles, and larder beetles. A sudden appearance of shiny metallic flies at an upstairs window in midwinter usually means exactly that.

What are the early signs, before the damage adds up?

Five things, and most of them show up weeks before anyone sees an actual mouse.

  • Rub marks. Mice follow the same routes and leave a faint greasy smudge along joists, pipes, and the base of walls. On a light-colored surface it reads as a dirty line that wasn’t there last year.
  • Gnaw marks on specific materials. Look at the corners of cardboard boxes, the edge of a plastic storage bin lid, and the soft wood at the bottom of a door frame or a stair stringer.
  • Sound with a schedule. Scratching or scrabbling in a wall or ceiling that starts around dusk and again before dawn, rather than randomly through the day.
  • Pet behavior. A dog or cat that fixates on one section of wall, one cabinet, or one spot on the floor for days is usually right.

The other one worth checking is smell. A persistent musky odor in a closet, a basement corner, or near a floor vent, particularly one that gets stronger when the furnace runs, generally means there’s a nest in the vicinity or something died in the cavity.

Any of those is worth acting on. All of them are cheaper to deal with in October than in March.

What to do next

If you’ve seen a mouse, heard activity in a wall, or found droppings anywhere, treat that as the start rather than the whole of it. Get someone into the attic and the basement joist bays, which is where the expensive damage happens and where you’re not going to notice it on your own.

Ehlers Pest Management works across southeastern Wisconsin, and you can reach our experienced team at (414) 303-6926 to schedule service. A certified technician will inspect the property, tell you what’s actually going on and how long it’s likely been happening, and lay out what it takes to close the building up before winter.

Categories Pest Identification & Prevention

Do Bugs Die in Winter in Wisconsin? What Actually Happens to Them

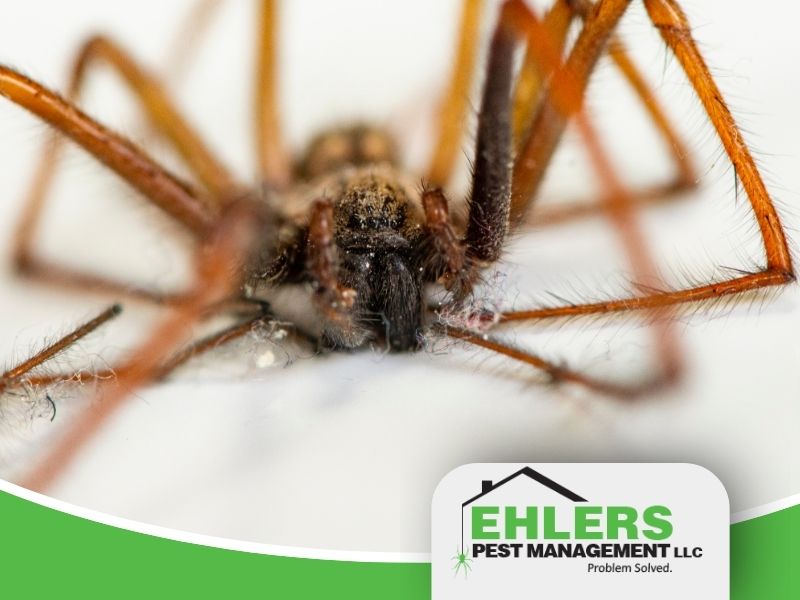
Close-up of a brown spider on a white surface, showing its legs and body—an example of bug survival even during Wisconsin winters; Ehlers Pest Management LLC logo is in the bottom right corner.

Every October someone asks whether they can pause pest control until spring, on the reasonable theory that a Wisconsin winter takes care of the problem. It’s a fair assumption and it’s mostly wrong. Do bugs die in winter here? A few do. Most have spent a very long time evolving not to, and the ones that cause the most trouble in this state are the ones winter doesn’t touch at all.

Here’s what actually happens to them between November and March, and what that means for the house you’re standing in.

Do bugs die in winter? Most Wisconsin insects don’t. They overwinter as eggs, as adults sheltered in leaf litter and wall voids, or below the frost line. Several pests never slow down at all, because they live indoors year round where the temperature never changes.

Do bugs die in winter, or do they just hide?

Some do. Far fewer than people think, and a hard freeze is not the reset button it gets credit for.

Insects that overwinter in Wisconsin are adapted to Wisconsin. Many species tolerate temperatures well below freezing, and some produce compounds that work like antifreeze, keeping ice crystals from forming inside their cells. A cold snap that feels brutal to you is within the normal operating range for an insect that has been living here since long before the house was.

There’s a detail that surprises people. Snow makes survival easier, not harder. A foot of snow insulates the ground beneath it so effectively that the layer where insects are sheltering stays close to freezing even when the air above is far below zero. A cold winter with deep snow is often gentler on the insect population than a mild one with bare ground and repeated freeze-thaw cycles.

Where do Wisconsin insects spend the winter?

Four strategies cover most of them.

  • As eggs. The adults die at frost and leave the next generation behind in egg cases on twigs, in soil, or in leaf litter. Nothing survives the winter except the eggs, and the population rebuilds from scratch in spring.
  • As sheltered adults. Box elder bugs, Asian lady beetles, stink bugs, cluster flies, and mated wasp queens go dormant in a protected space and wait. In a wooded lot that means under bark. On your property it often means your wall voids and attic.
  • Under insulation outdoors. Leaf litter, mulch, brush piles, and the soil below the frost line all stay survivable. Many spiders and ground beetles do this, and so do ticks, which is why they’re active again on the first warm day in March.
  • As larvae or pupae. Some species pass the winter mid-development, underground or inside a host, and finish the job in spring.

Which pests never leave at all?

The ones that matter most in a Wisconsin winter, because they live inside with you and the season is irrelevant to them.

Mice and rats are the obvious case. They move indoors in fall and stay active all winter in a heated building, breeding the whole time. Winter is their busy season, not their off season.

German cockroaches live entirely indoors and never encounter winter. If anything, the furnace helps them, since warmer interior temperatures speed up their development. A small population in October is a considerably larger one by February.

Bed bugs are the same story. They’re in a bedroom at a steady temperature, and the outside weather has no bearing on them whatsoever.

Silverfish, house spiders, and pantry pests round out the list. All of them are indoor residents rather than seasonal visitors.

Does a cold winter mean fewer bugs next year?

Less than the internet suggests, and the relationship is messier than a simple yes.

What actually drives next summer’s populations is spring and summer conditions: moisture, temperature, and how early things warm up. A wet spring will produce more mosquitoes than a cold January prevents. Insects that made it through the winter reproduce fast enough to make up ground quickly once conditions turn.

And as noted above, a cold winter with consistent snow cover can be easier on overwintering insects than a mild one with bare ground, because the snow insulates and the mild winter puts them through repeated freezing and thawing. So the January headline about a deep freeze knocking back the bug population is usually optimistic.

Why do bugs show up indoors in January?

Because they were already in the building and something woke them up.

The insects that moved into your walls and attic in September and October are dormant rather than dead. A stretch of warm weather, a sunny afternoon against a south wall, or heat moving through the structure raises the temperature in that cavity enough to bring them out of dormancy. Then they move toward warmth and light, which leads them into your living space.

That’s why box elder bugs turn up on a window sill in February and why cluster flies appear in an upstairs bedroom during a thaw. Nothing got in that week. They’ve been there since fall, and the thaw just found them.

It’s also why the same thing happens again in March, and why people assume they have a new problem when they have the same one.

Is winter pest control worth anything?

For some things it’s the most important season of the year, and for others there’s genuinely nothing to do.

Rodent work is at its peak value in winter, because that’s when the population is indoors, concentrated, and findable. Roach and bed bug work runs on its own timeline and doesn’t care what month it is. Interior monitoring catches the things emerging from wall voids during thaws.

Exterior work is a different matter. Treating the outside of a house in eight-degree weather with snow against the foundation accomplishes very little, and any company selling a year-round exterior program in Wisconsin is applying a model that was designed somewhere warmer. We’d rather tell you the exterior visit isn’t worth doing in February than take the money for it.

What should you do before it freezes?

The useful work is all happening in the next few weeks.

  • Seal the gaps, because every opening you close now is one that isn’t letting something in to overwinter. It’s also the last comfortable window to do foundation work before the ground hardens.
  • Get exterior treatment done while it still does something, particularly if your house collects box elder bugs or cluster flies on the sunny walls.
  • Clear leaf litter, mulch, and brush back from the foundation, since that’s where the outdoor overwintering population is settling in right now.
  • Deal with any rodent activity you already know about, rather than waiting to see whether it gets worse. It will.

What to do next

If you’ve been planning to pause service until spring, the thing worth knowing is which category your actual problem falls into. Mice, roaches, and bed bugs don’t care that it’s January. Box elder bugs and cluster flies are already in the walls and will be at your windows during the first thaw. Neither of those situations improves on its own.

Ehlers Pest Management works across southeastern Wisconsin year round, and you can reach our experienced team at (414) 303-6926 to schedule service. A certified technician will tell you what’s worth doing before the ground freezes, what’s better handled inside once it does, and what genuinely can wait until spring. That last category is real, and we’ll name it.

Categories Pest Treatment & Services

How to Prepare for Pest Control: What Changes by Service Type

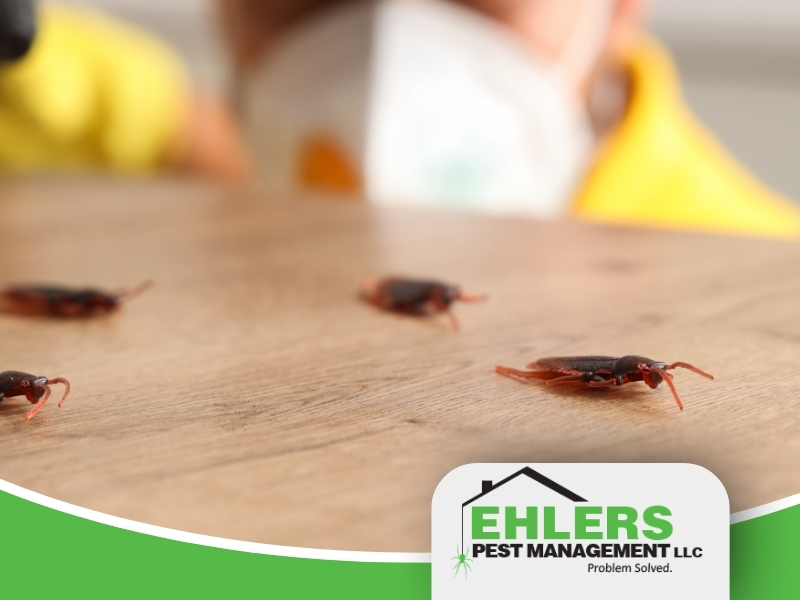
Close-up of cockroaches on a wooden surface with a blurred pest control worker in the background as they prepare for pest control. Ehlers Pest Management LLC logo is in the bottom right corner.

Most advice on how to prepare for pest control is written as one generic checklist, which is part of why specialty jobs fail. What a roach treatment requires and what a rodent inspection requires have almost nothing in common, and preparing for the wrong one wastes everybody’s time.

Here’s what actually matters, broken out by the service you’ve booked.

How you prepare for pest control depends on the service. A general treatment needs clear baseboards and perimeter access. A rodent inspection needs access to the basement, crawl space, and attic. Roach and bed bug work needs cabinets emptied, laundry handled, and the space vacated.

Does preparation actually change the outcome?

For general pest control, it helps. For specialty work, it decides whether the job succeeds.

Incomplete preparation is the single most common reason a roach or bed bug treatment has to start over. Not a product failure, not a technique failure. A cabinet that didn’t get emptied, or laundry that didn’t get handled, and the population survives in the part nobody could reach.

So if the instructions you’re given seem excessive, that’s the reason. They’re written from the jobs that went wrong.

How do you prepare for pest control that covers the whole house?

Clear access, and get the living things sorted out.

  • Move furniture, boxes, and storage a foot or so away from the walls in the rooms being treated, since the perimeter is where the work happens.
  • Put pets somewhere else for the visit and for whatever re-entry period the technician specifies. Cover fish tanks and switch off the air pump during interior application.
  • Pick up items off the floor, and clear countertops in kitchens and bathrooms.
  • Outside, move hoses, toys, planters, and stored items back from the foundation, unlock any gates, and bring dogs in.

One more that gets missed: trim back shrubs and ornamental grasses touching the siding. A technician can’t treat a foundation line they can’t reach, and vegetation against the house is often part of why you have the problem.

What’s different for a rodent inspection?

The job is looking rather than spraying, so access is everything.

What a technician needs to get to is the basement perimeter, especially the joist bays above the foundation wall, the crawl space hatch, the attic access, and the garage. Storage stacked against basement walls is the most common obstacle, and those walls are exactly what needs examining.

The other half is information, and it’s worth writing down before the visit. Where you’ve seen droppings, where you’ve heard activity and at what time of day, when it started, and what you’ve already tried. Photos of droppings help a technician tell mice from something else without guessing.

If there’s a crawl space, make sure it can actually be opened. A hatch that’s been painted shut or buried under storage turns a productive inspection into a return trip.

How do you prepare for roach treatment?

This is the heavy one, and doing it halfway is worse than not booking at all.

  • Empty kitchen and bathroom cabinets and drawers completely, and put the contents somewhere outside the treatment area rather than piled on the counter.
  • Clear counters, and pull out and unplug small appliances, since the motor housings are common harborage.
  • Remove clutter, especially cardboard, paper bags, and stacked boxes. Roaches live in corrugated cardboard and it has to go.
  • Vacate for the period specified, and take pets with you.

In a duplex or a multi-unit building, the neighbors matter. Treating one unit while the adjoining ones go untreated produces a temporary drop and a full recovery, so if you’re a tenant, this is worth raising with your landlord before the appointment rather than after.

What about bed bug treatment?

Similar intensity, different specifics, and one rule that matters more than the rest.

Don’t move items from an infested room to another room. That’s the instinct, and it’s how a bedroom problem becomes a whole-house problem. Bag things where they are and follow the laundering instructions you’re given, which typically means a hot wash and a full hot dryer cycle, then sealed bags until the job is finished.

Expect to vacate for several hours per visit, expect more than one visit, and expect a monitoring period afterward before anyone calls it resolved. Strip beds if you’re asked to and leave the mattress accessible from all sides, which usually means pulling the bed away from the wall.

What should you tell the technician?

More than most people do, and it changes the visit.

What you’ve seen, where, when, and how often. What time of day. Whether it’s one room or several. What you’ve already tried, including any store-bought products, because that affects what’s appropriate next and whether anything has been driven deeper into the structure.

Recent building work matters too. A new furnace, a plumbing repair, a deck, or a cable run all create openings, and a technician who knows a contractor was there in August will check different places.

What should you not do beforehand?

Four things, and the first two are counterintuitive.

  • Don’t deep clean baseboards and perimeter surfaces right before an interior treatment. Scrubbing removes residue that’s meant to stay put, and you’ll be asked to avoid it afterward anyway.
  • Don’t set off a fogger or bug bomb in the days before a visit. It scatters the population deeper into wall voids and into adjoining rooms, and it makes the real treatment harder.
  • Don’t spray over gel bait placements if any have already been set. The two cancel each other out.
  • Don’t move the problem around. Shifting infested furniture, boxes, or bedding to another room spreads it and resets the job.

What happens after the visit?

A few things are normal and worth expecting.

You may see more activity for a short stretch, not less. Treatments flush insects out of harborage, so the first few days can look worse before they get better. That’s the process working.

Hold off on mopping or washing treated surfaces for whatever period the technician specifies, since that’s the material doing its job. For fleas, keep vacuuming daily for a couple of weeks, because the vibration pulls pupae out of their protected stage and into contact with the treatment.

And keep notes. What you see and when, in the days after, is the most useful thing you can hand a technician at the follow-up.

What to do next

When you book, ask specifically what preparation your service requires and get it in writing or by email rather than relying on memory. The instructions differ enough between services that assuming you know is how people end up redoing a job.

Ehlers Pest Management serves homes and businesses across southeastern Wisconsin, and you can reach our experienced team at (414) 303-6926 to schedule service. We’ll tell you exactly what to do before the visit for the service you actually need, and we’ll be straightforward about which parts are essential and which are just helpful.